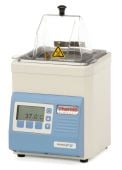
In laboratory settings, a general purpose water bath plays a significant role by uniformly regulating the temperature of liquids. This precise temperature control is essential for various laboratory procedures, such as incubating samples, conducting chemical reactions, and melting or solidifying materials.
Following proper use and maintenance guidelines for your lab water bath ensures optimal functionality and prevents potential issues like rusting, contamination, and other problems. Adhering to these guidelines will provide reliable performance and extend the lifespan of your unit.
Safety Precautions to Always Observe
To ensure the safety of the unit, user, and laboratory environment, it is crucial to take these precautionary measures when using a water bath:
Personal Protective Equipment (PPE)
Always wear gloves and eye protection when working with water baths. This precaution mitigates potential harm from splashes and other forms of exposure, fostering a secure laboratory environment for various procedures.
Additionally, carefully assess the nature of the substances being handled. If necessary, utilize additional personal protective equipment to minimize associated risks.
Heating Element
Avoid direct contact with the heating element to prevent potential burns or other injuries. Only operate the device when filled with water to prevent damaging the heating element and the bath.
Sample Handling
Use appropriate tools to handle hot samples and avoid splashing yourself or others. These tools include sample racks, tube racks, flask trays or holders, tongs, and more.
Electrical Safety
Remain vigilant regarding electrical hazards. Ensure proper device grounding and avoid spilling contents near electrical cords, plugs, and outlets. Ground-fault circuit interrupter (GFIC) waterproof plugs are highly recommended. Always disconnect the equipment from the power source when not used.
Water Level and Loading
Monitor the bath water level regularly, as low levels can damage the heating element during operation. Avoid overloading the bath with samples or placing heavy objects inside, as this can adversely impact the temperature control.
Tips When Selecting Compatible Liquids
Incorporate the appropriate liquids to ensure optimal performance and the longevity of your water baths. Here are some notable considerations when choosing a suitable liquid:
Avoid Flammable Liquids
Never use flammable liquids under any circumstances, as they pose a significant fire hazard. This precaution is crucial for the safety of individuals and the laboratory environment.
Use Distilled and Deionized Water
Use only distilled and deionized water. Tap water contains minerals that can cause impurities and a buildup of ions on stainless steel, which could affect performance over time.
Caution with Water Purification Units
Some lab purification devices utilize salt-back flush mechanisms that can potentially accumulate sodium ions in the bath's interior, resulting in possible corrosion over time in the bath’s interior.
Users may want to consider alternative water purification methods, as the impact on your water bath varies depending on the specific unit type and maintenance procedures.
If other liquids are necessary for sample preparations, consult your manufacturer’s manual to determine if the liquid is feasible for your unit.
How to Calibrate a Lab Water Bath
Many general purpose water baths have a calibration feature to ensure precision. It enables users to align the temperature display with the actual temperature of the water. This functionality enhances the accuracy of temperature readings, guaranteeing precise and reliable performance in lab applications.
Step 1: Acquire a Reference Thermometer
Have a reference thermometer ready to help you measure the exact temperature of the bath’s liquid.
Step 2: Fill the Bath
Subsequently, fill it with sufficient water to immerse the reference thermometer probe and any samples slated for incubation.
Step 3: Set the Temperature
Set the water bath to the desired temperature. Put the reference thermometer in, ensuring it doesn't touch the sides or bottom. Allow the water to attain equilibrium over 15-30 minutes (or longer, if needed), allowing the reference thermometer to stabilize at the water's actual temperature.
Step 4: Measure the Temperature in the Unit
Once equilibrium is reached, read the temperature on the reference thermometer, denoting the actual water temperature. Adjust the temperature display on the water bath to align with the temperature recorded on the reference thermometer.
Repeat these steps across various temperatures for comprehensive accuracy, covering the entire temperature range.
Step 5: Record the Data
Record the calibration data, as the documentation enables tracking accuracy over time. By following these steps, you can ensure precise and reliable temperature control.
Key Reminders When Cleaning and Prepping
If the bath is used regularly, weekly routine cleaning is vital to remove debris and contamination and prevent corrosion. When used for biological applications, water baths can be a breeding ground for algae, fungi, and other dangerous pathogens.
- Unplug the equipment from the power outlet and allow the liquid to cool to room temperature.
- Dispose of the liquid according to laboratory safety guidelines, especially if harmful substances contaminate the fluid.
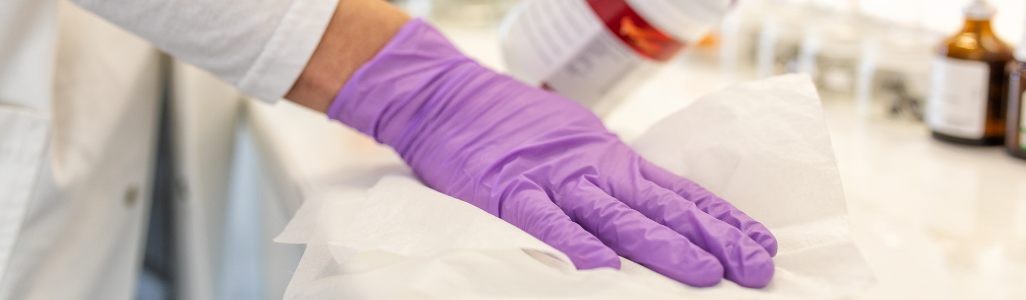
- Clean its interior with a mild detergent solution using a soft cloth. Pay special attention to the corners, crevices, and around the heating element to guarantee a close clean. If you use the device for more hazardous substances, use an appropriate disinfectant.
Never use products that may damage the bath’s surface, such as scouring powders, steel wool, or other abrasive pads/sponges. Also, avoid using cleaning agents such as bleach (sodium hypochlorite) or other chlorine-based cleaners or disinfectants.
- Thoroughly rinse the interior with distilled water to eliminate detergent residue. Adhere to the manufacturer's instructions or your laboratory’s safety guidelines for correctly utilizing and disposing of disinfectant.
- Use a damp cloth to remove dust and dirt from the exterior surface. To prevent contamination, thoroughly clean the surrounding work surfaces, tools, and any items that came into contact with the liquid using an appropriate disinfectant.
- Thoroughly dry the equipment's exterior and interior before the next use.
Ensure Proper Setup and Utilization
To guarantee safety and reliability, standard procedures must be followed before, during, and after your water bath application. Here's a step-by-step guide:
Step 1: Placement
Place the equipment on a stable and level surface. Allow ample space around the bath, approximately 12 to 24 inches, to facilitate ventilation and easy control access.
Step 2: Fill The Bath
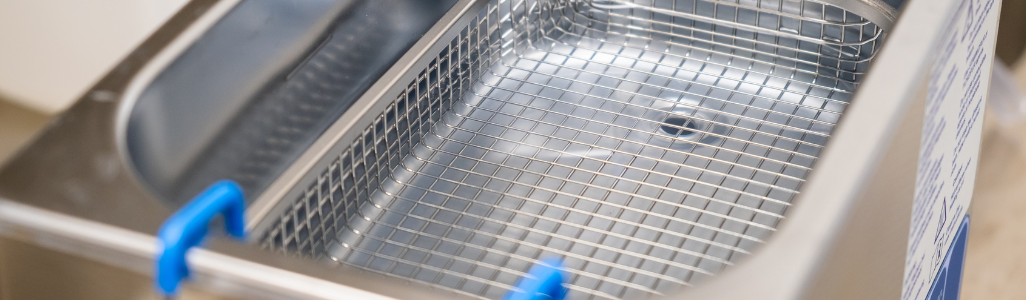
Proceed to fill it with adequate water. The water level should be sufficient for the needs of the samples, which vary depending on the procedure, the depth of the bath, and the size of the samples.
Step 3: Set The Temperature and Introduce Samples
Once filled, turn on the bath and set your desired temperature. After configuring the temperature, carefully introduce the samples into the water bath. The samples should be adequately spaced and not come into contact with each other or the bath's inner walls. Utilize racks or baskets to maintain organization and prevent floating.
Step 4: Monitor the Temperature
Carefully check the temperature throughout the incubation process using the built-in thermometer or a separate reference thermometer. This will help guarantee the stability of the selected set point.
Step 5: Remove Samples
After incubating, remove the samples for rapid cooling and turn off your unit if it is no longer needed. If necessary, consider transferring them to a cold water bath or an ice bath.
Step 6: Clean the Unit
Once your bath has completely cooled, thoroughly clean it and prepare it for subsequent use. See the previous section for a full breakdown of cleaning and prepping the equipment.
Exceptions may apply. Please consult your manufacturer's manual for the best practices for your unit.
Purchasing A Laboratory Water Bath

When shopping for your next general purpose water bath, consider factors such as its features, capacity, accessory options, material, construction, safety features, and brand reputation to ensure you receive a reliable model that meets your needs. You might also want to note environmental factors like space availability and energy efficiency to see if they suit the location and power requirements.
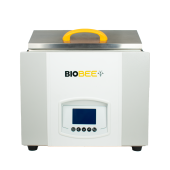
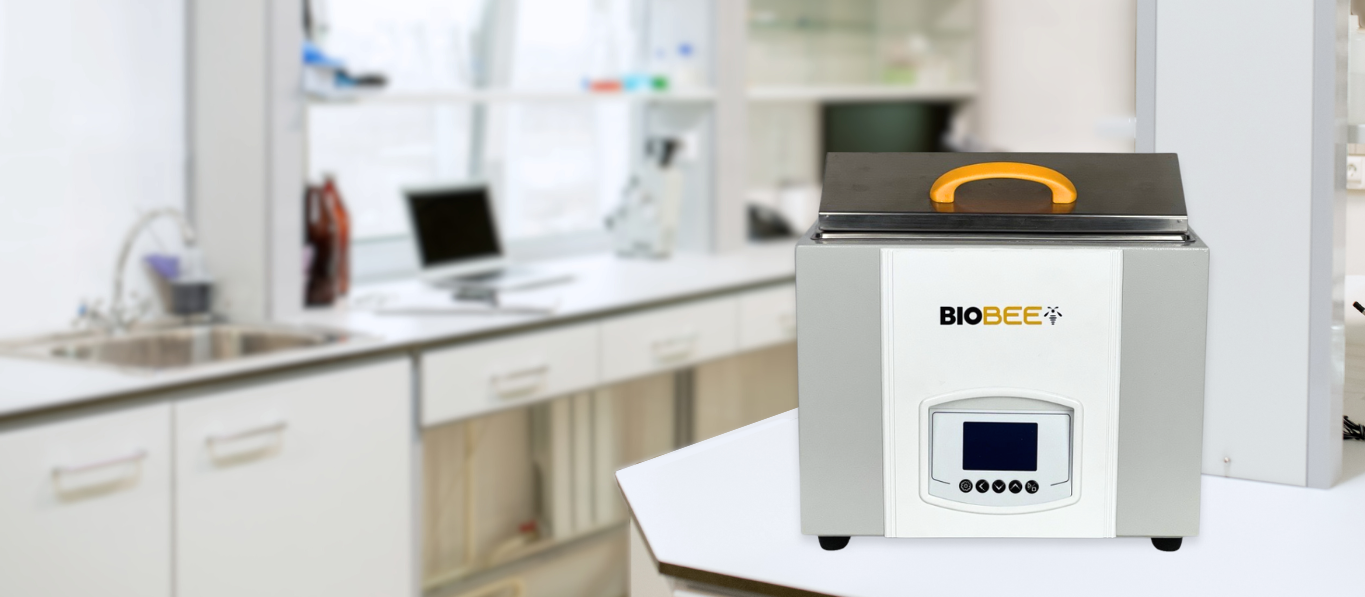
One example is the BIOBEE General Purpose Water Bath (5-20L). It stands out with a broad temperature range (5°C to 100°C) and impressive accuracy (±0.1°C), making it well-suited for various applications that demand precise temperature control.
This model also features a digital display and intuitive controls, ensuring effortless operation. Its robust stainless-steel construction guarantees durability, and including safety features like overheat protection and low-water level alarms provide added assurance. Notably, it is energy-efficient, contributing to cost savings over the long term.
The BIOBEE General Purpose Water Bath is an excellent option for both regular tasks and complex experiments. With their blend of high performance, user-friendly attributes, and long-term value, they are well-equipped to fulfill the diverse needs of any laboratory.