How to Calibrate a pH Meter: Thermo Scientific Orion Star A211 with an Orion pH Electrode
Follow our 10-step guide to calibrate your Orion Star A211 benchtop pH meter and master proper pH electrode maintenance.
A properly calibrated pH meter is exactly what you need to ensure accurate pH measurements. Fortunately, you can perform the complete calibration process yourself by referring to the step-by-step guide we have prepared.
Our guide will help you calibrate your Thermo Scientific Orion Star A211 Benchtop pH Meter using an Orion pH electrode. Follow each step to the tea, and you will be assured of dependable pH readings.
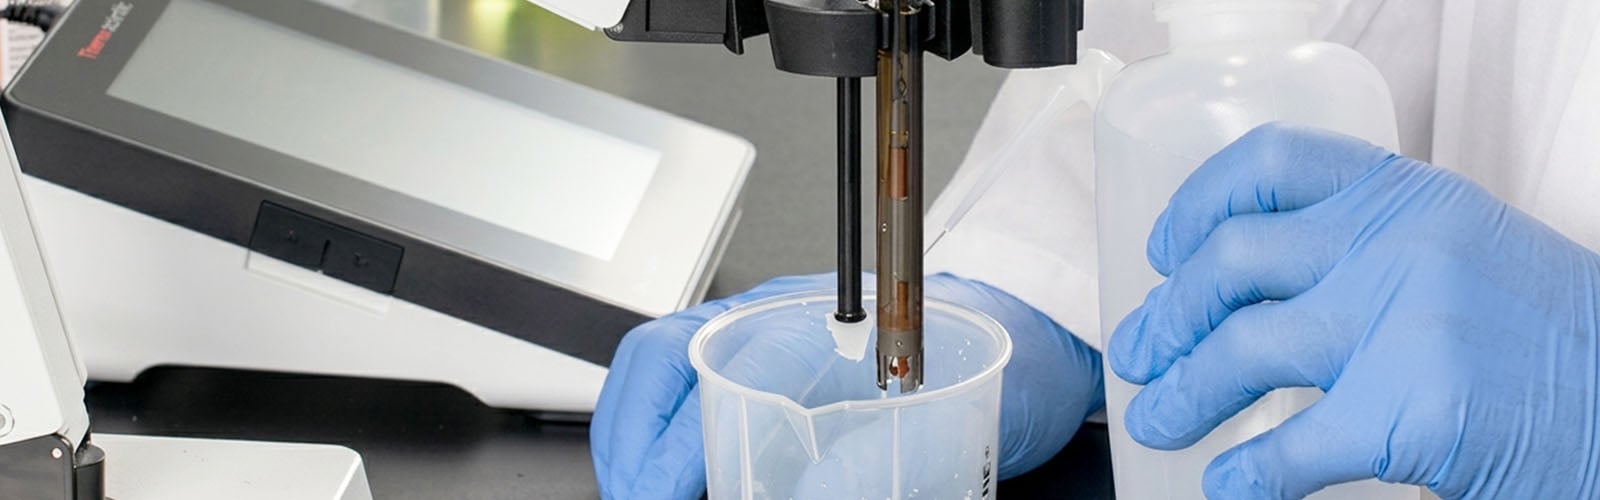
Step #1: Gather everything you need.
Before you begin, make sure you have the following tools to perform the correct pH meter calibration:
-
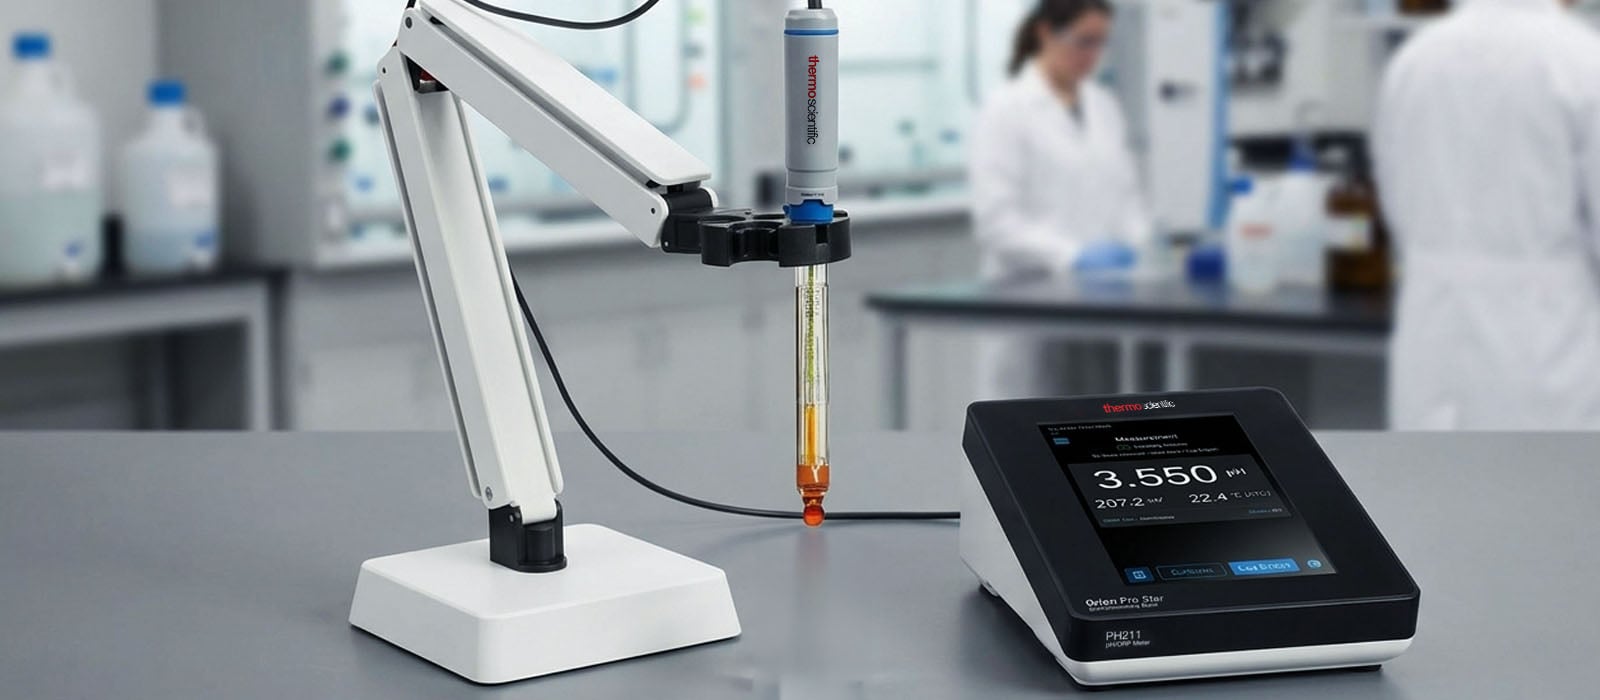
Thermo Scientific Orion Star A211 Benchtop pH Meter
-
Orion pH electrode (e.g., ROSS Glass Refillable pH/ATC Triode)
-
pH buffer solutions (pH 4.01, pH 7.00, and pH 10.01)
-
Deionized or distilled water (for rinsing)
-
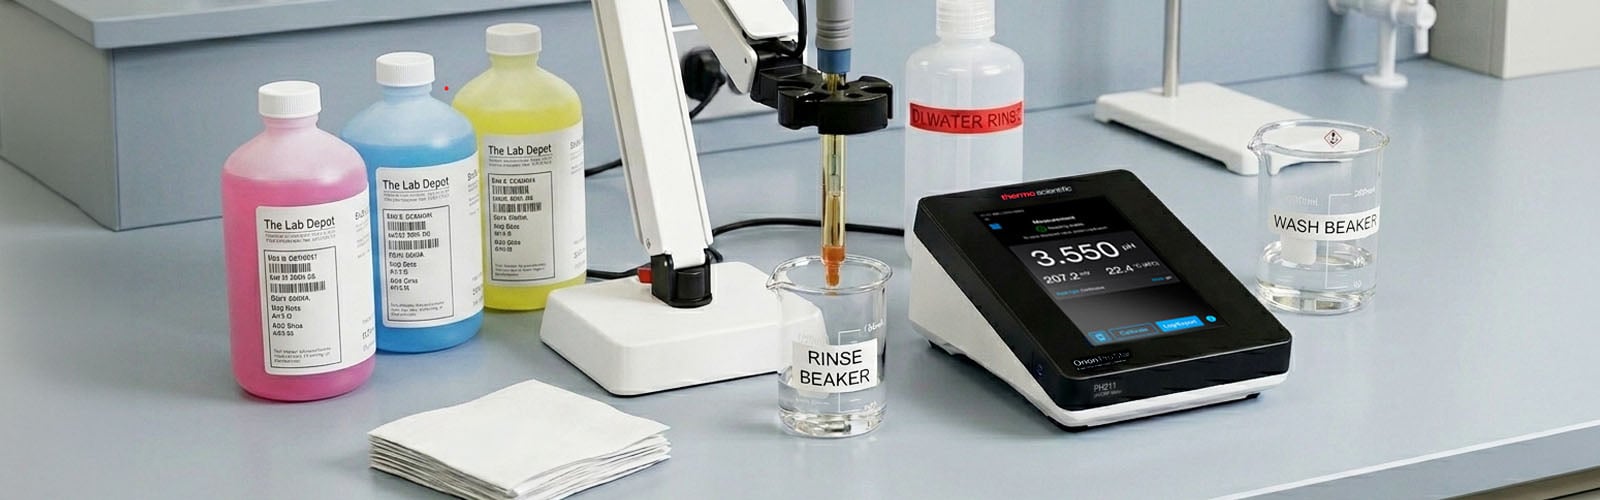
A rinse beaker and a waste beaker
-
Lint-free tissue or soft cloth for blotting
Tip: Use fresh, non-expired buffer solutions all the time. Contaminated or outdated buffers are amongvcc the most common causes of calibration errors.
Step #2: Set up and power on.
Connect the pH electrode to the meter and place it on the electrode stand. Power on the Orion Star A211 and allow it to warm up briefly. The backlit LCD display will show the current pH, temperature, date, time, and electrode condition at a glance.
Step #3: Prepare your buffers.
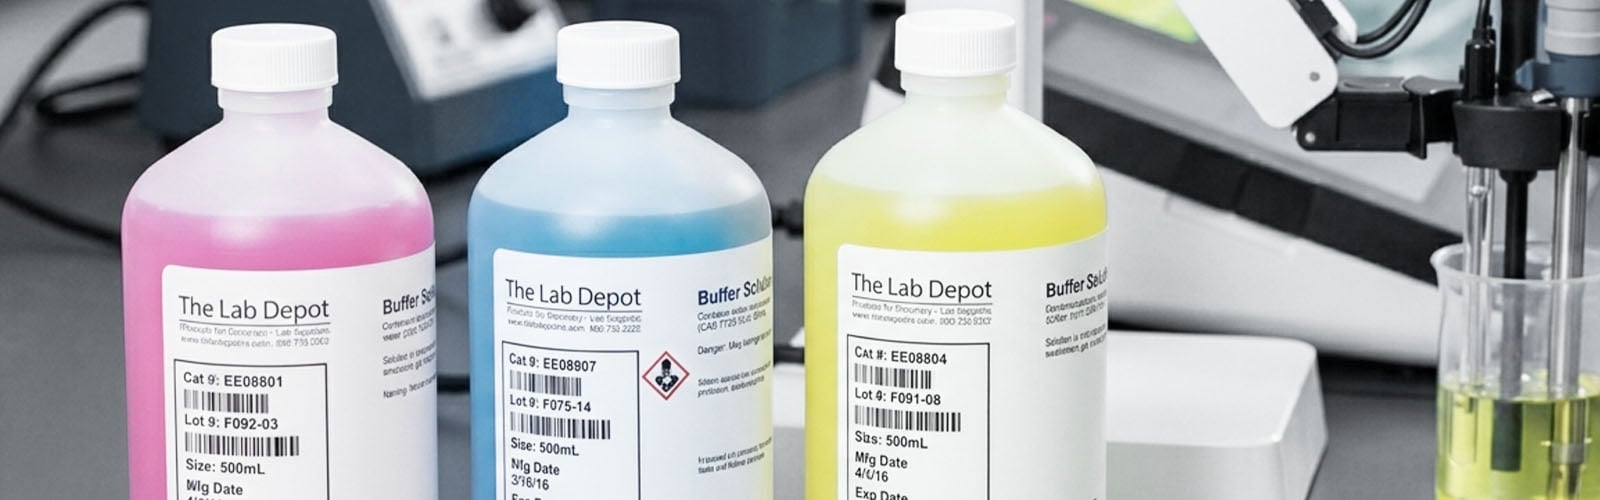
Pour fresh buffer solutions into clean, separate beakers. You will want at least two buffers that bracket your expected sample pH range. The most common three-point calibration uses pH 4.01, 7.00, and 10.01.
Once the buffers are transferred, clearly label the beakers. Set aside a separate rinse beaker of the same buffer for rinsing.
Tip: Never rinse directly into your calibration beaker, as this can contaminate the buffer and skew your results.
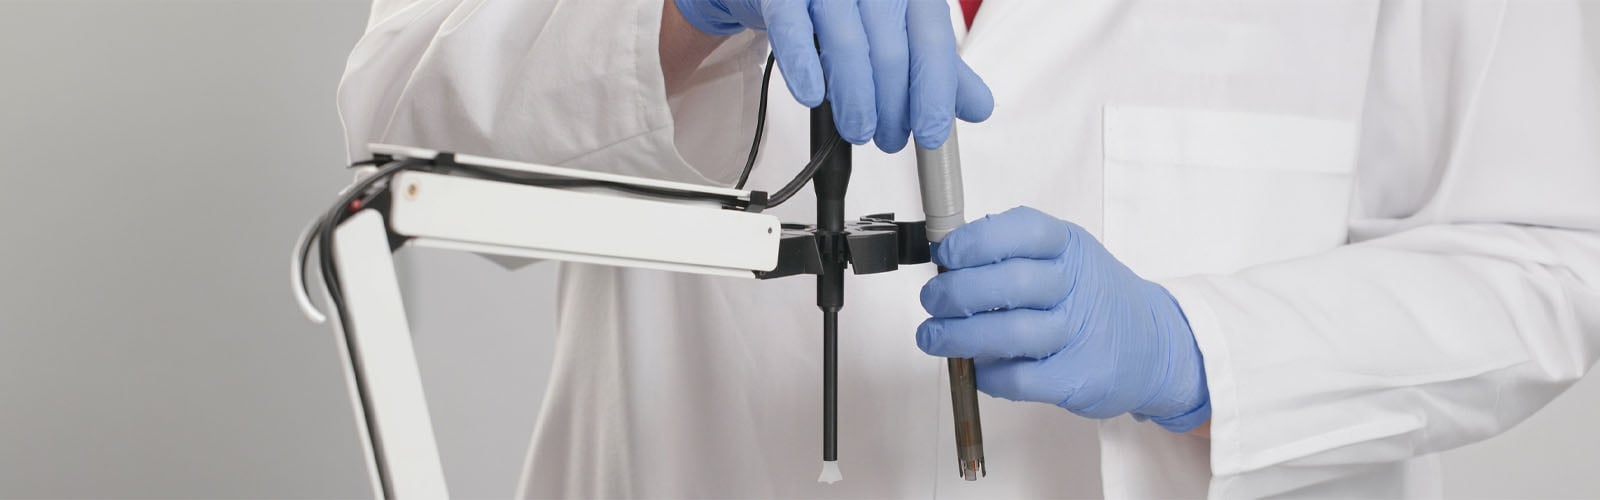
Step #4: Rinse the electrode.
Before placing the electrode in the first buffer, do these two steps:
-
Rinse the electrode with deionized water over a waste beaker.
-
Gently blot--not rub--the electrode tip using a lint-free tissue to remove excess water.
Step #5: Enter calibration mode.

Press the Cal (calibrate) button on the meter to enter calibration mode. The display will prompt you through each step with plain-language on-screen instructions.
Step #6: Calibrate with the first buffer (pH 7.00).
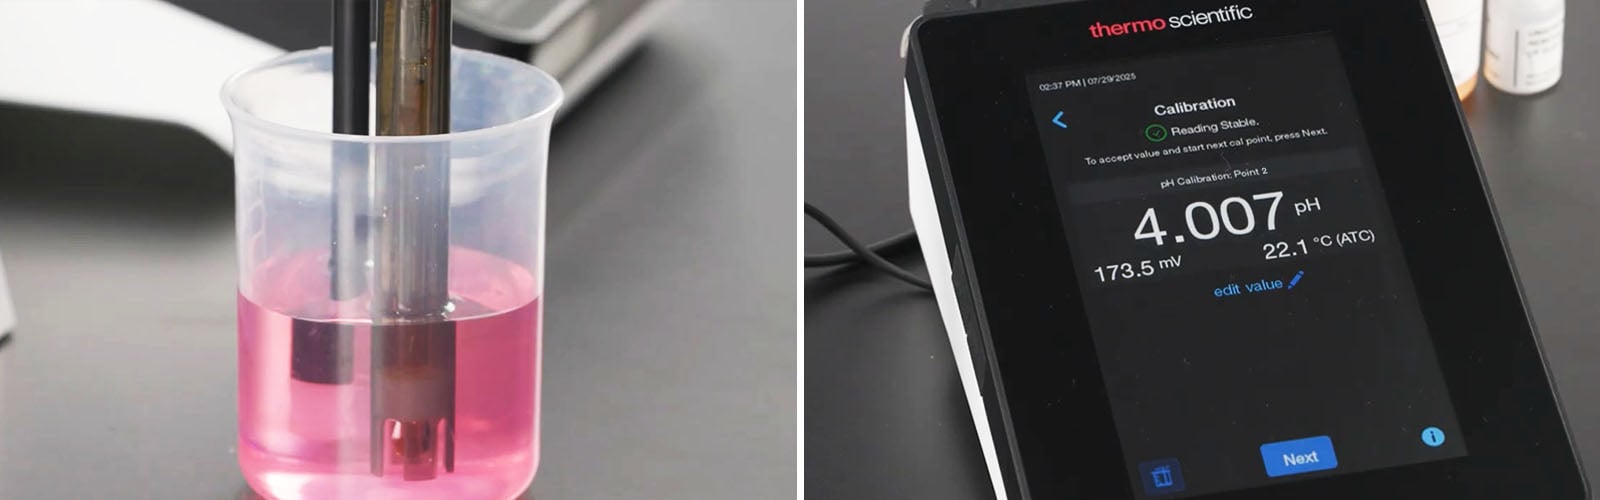
The pH 7.00 buffer sits at the midpoint and gives the benchtop pH meter a solid baseline. For these reasons, using it as the first buffer is highly recommended.
For proper calibration, take note of these tips:
-
Immerse the electrode fully in the pH 7.00 calibration beaker, ensuring both the sensing bulb and reference junction are submerged.
-
If using a stirrer probe, stir at a moderate, uniform rate.
-
Wait for the reading to stabilize. The meter's stability indicator will signal when the reading is ready.
-
The meter will automatically recognize the buffer and prompt you to accept the calibration point.
Step #7: Calibrate with the second buffer.

Rinse the electrode with deionized water, then rinse again with a small amount of the next buffer solution, using the separate rinse beaker. Blot dry and move to the next buffer.
Repeat the immersion and stabilization process at pH 4.01 (for acidic samples) or pH 10.01 (for alkaline samples), depending on your application.
Step #8: Add a third calibration point. (Optional but recommended)
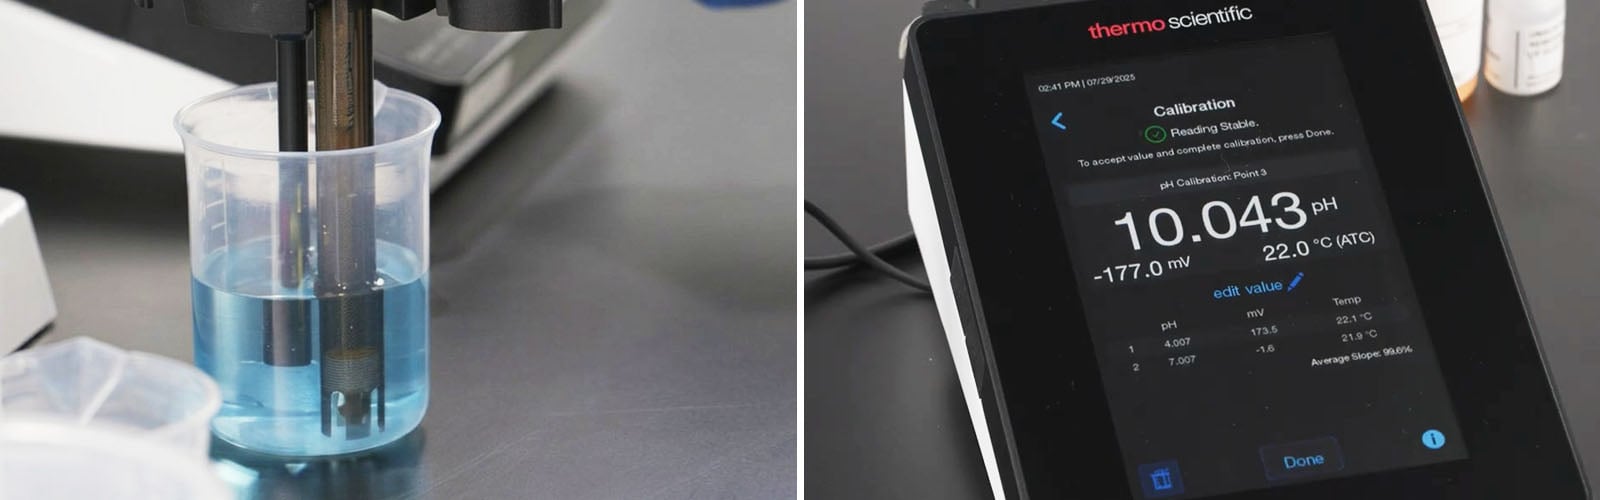
For a more accurate calibration curve across a wider pH range, add a third buffer point. Rinse the electrode again and repeat the process with the remaining buffer.
Note: The A211 can store up to 5 calibration points, allowing you to build a highly precise multipoint calibration curve.
Step #9: Review the calibration summary.
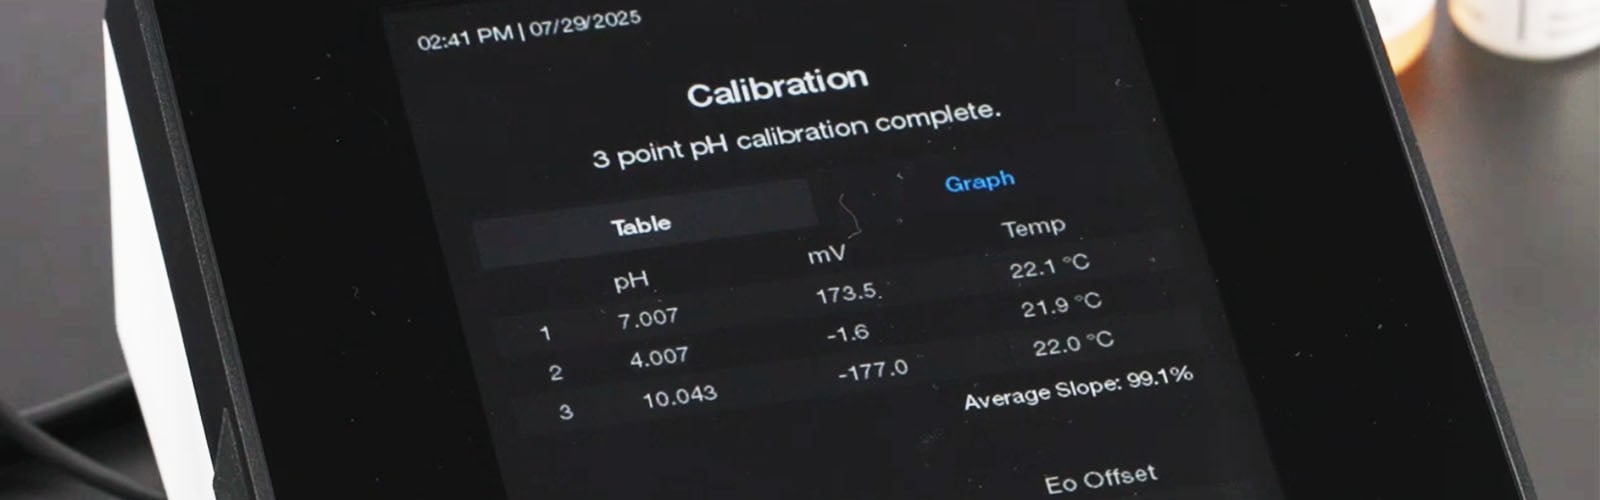
After all points are accepted, the pH meter displays a calibration summary, including:
-
Electrode slope (ideally between 95–105% for a healthy electrode)
-
Offset value
-
Electrode condition icon
If a single calibration point needs adjustment, the calibration editing feature lets you fix individual points without redoing the entire calibration.
Step #10: Return to measurement mode.
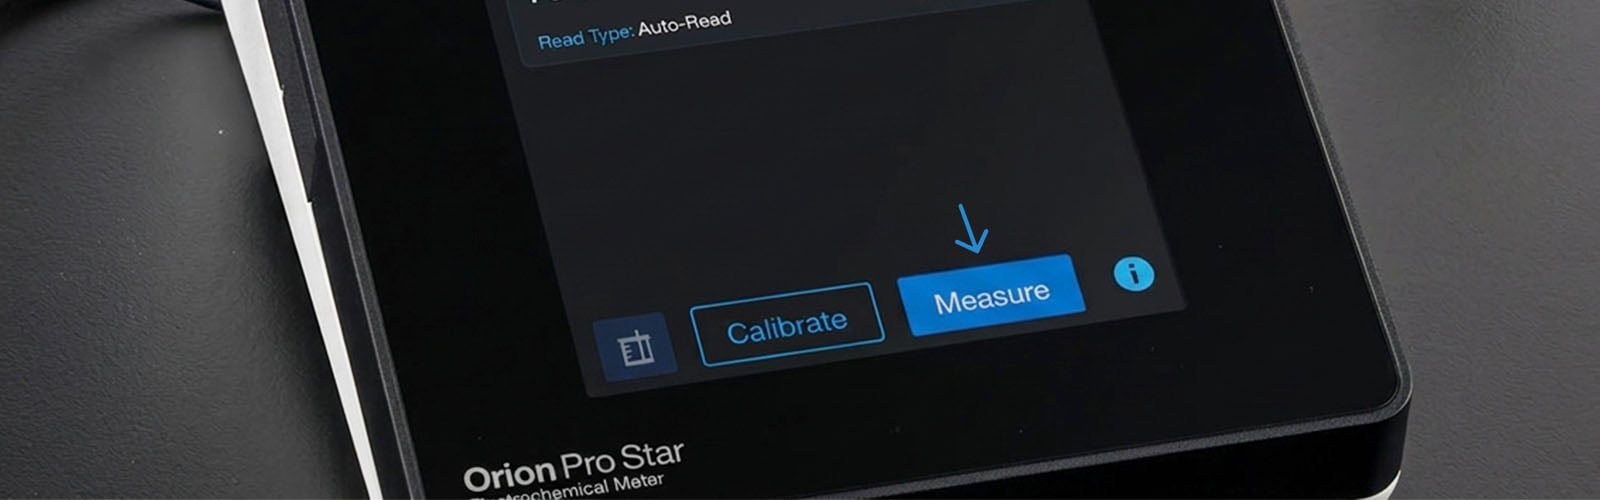
Press the Measure button (or f1/Meas soft key) to exit calibration and return to measurement mode. Your meter is now ready to take accurate pH readings.
What Should You Do After a Complete Calibration?
-
Rinse the electrode with deionized water, then with a small amount of your sample.
-
Immerse the electrode fully in your sample solution.
-
Allow the reading to stabilize. Use Auto-Read mode to have the meter hold a stable reading automatically, or Continuous mode to watch the reading in real time.
-
Record your result. The display simultaneously shows pH, temperature, date, time, and calibration status.
4 Useful Tips for Maintaining Your Electrode
-
Never store the electrode dry or in distilled water. Always keep it in the recommended electrode storage solution or pH 4 buffer.
-
Soak the electrode in storage solution for several hours before use, but only if it has dried out.
-
Rinse with deionized water between samples to prevent cross-contamination.
-
Monitor the electrode condition icon on the display, as it provides a quick visual indicator of electrode health.
Frequently Asked Questions
How many data point sets can the Orion Star A211 log?
The Orion Star A211 can log up to 2,000 data point sets with time and date stamps. You can transfer data to a computer via USB or RS232 using the free Orion Star Com software. The calibration log stores the 10 most recent calibrations for your records.
Should I calibrate my lab pH meter?
Yes. pH electrodes tend to drift due to various reasons, such as contamination and temperature changes. Regular calibration corrects drifting.
How often should I calibrate my pH meter?
Calibrate at least once a day, or before each measurement session for critical work.
Can I use custom buffer values?
Yes. In addition to automatic NIST and DIN buffer recognition, you can manually enter custom buffer values for non-standard applications.
What does the electrode slope tell me?
A slope between 95–105% indicates a healthy electrode. When it deviates outside this range, your electrode may require cleaning, conditioning, or replacement.
What if one calibration point is off?
A full recalibration is not needed. Instead, use the calibration editing feature to correct individual points.
Equip your lab with reliable pH meters and electrodes from The Lab Depot. Contact our team today at 1-800-733-2522, email, or through live chat on our website.